Cove Chat comment
Cove Chat was one of the first 3rd services named ghost, before ghost launched the commenting feature.
Step #1: Register for a Cove Chat account and configure it to use
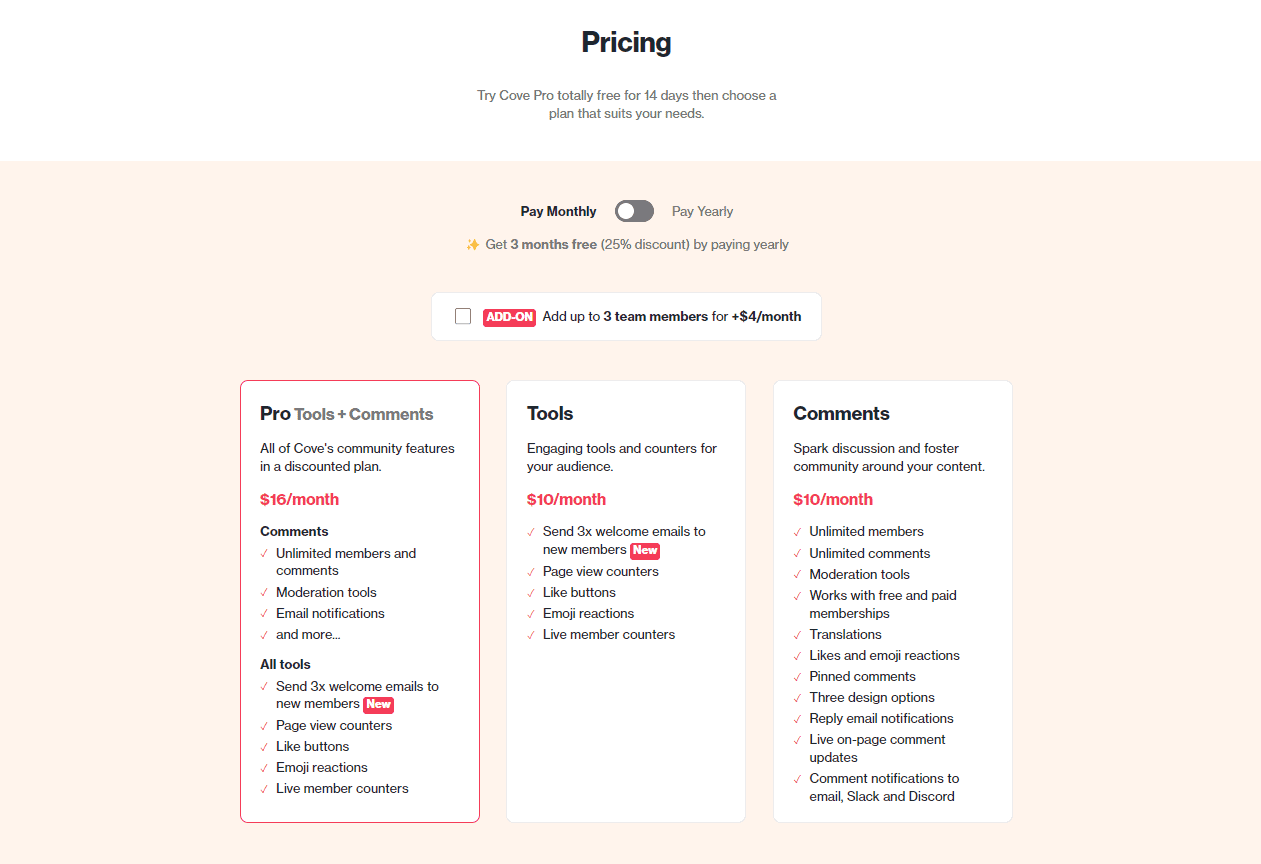
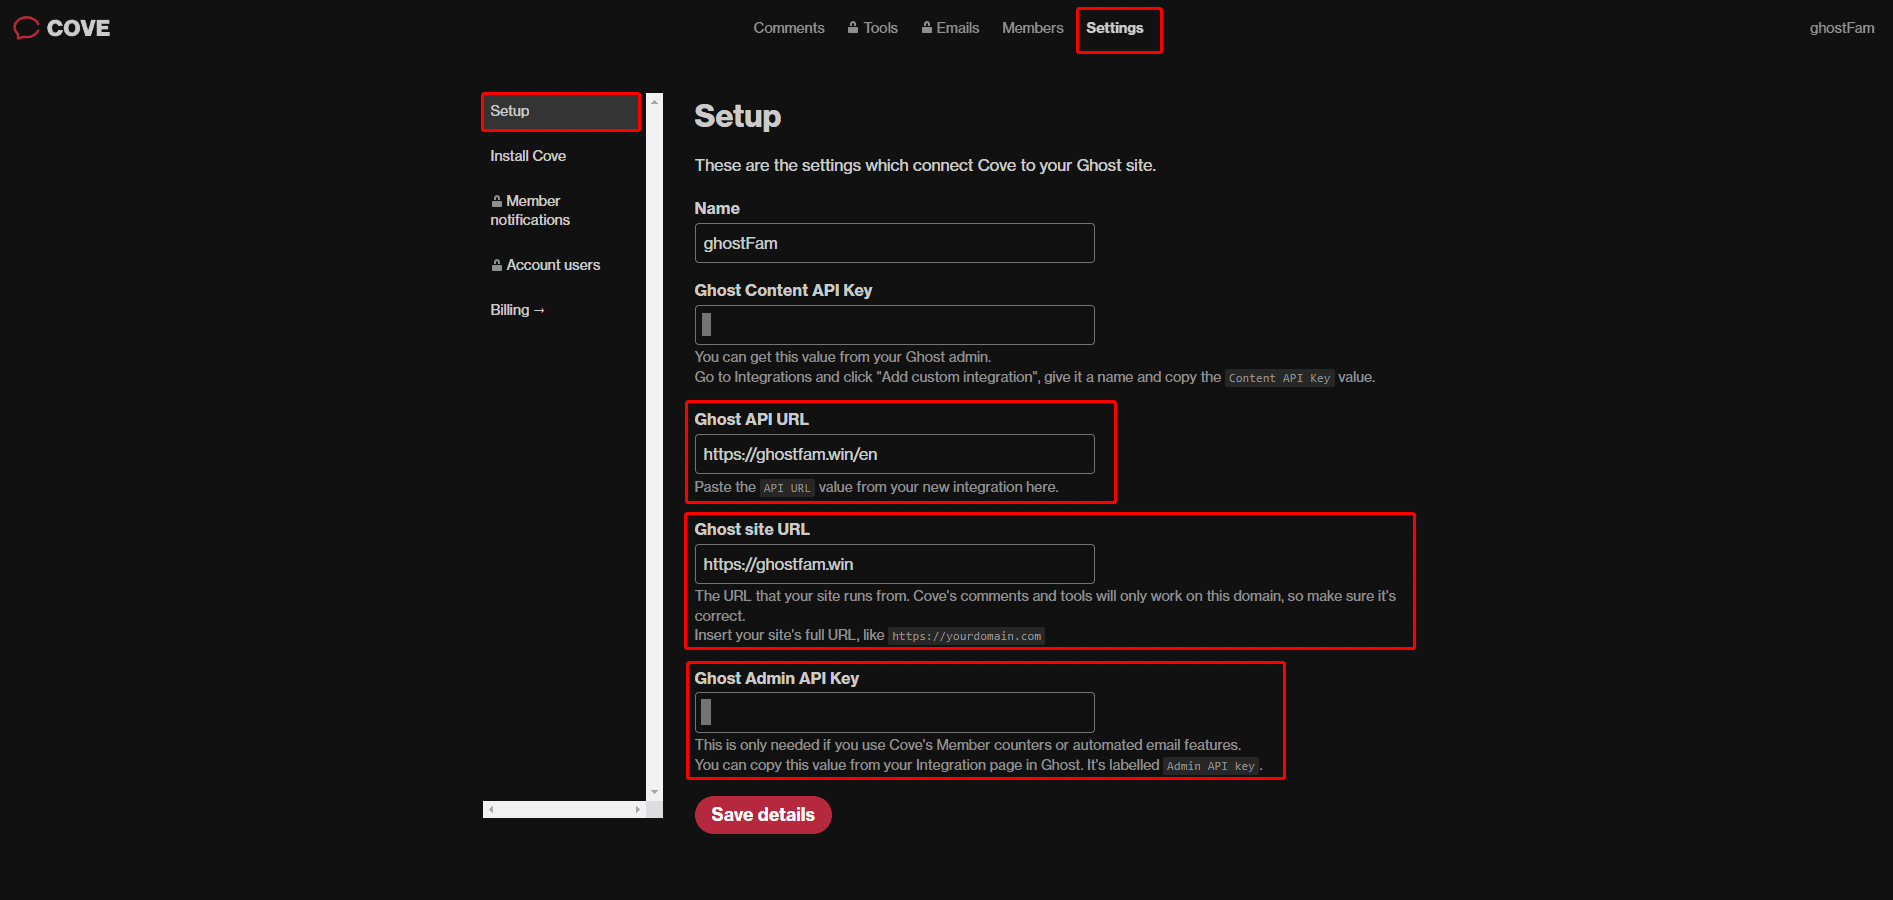
You sign up for 1 of 3 packages of Cove Chat to start using. At the list of Cove Chat you need to fill in the following information:
- Content API key
- URL API
- Admin API key
How to get Admin API key and Content API key as follows: go to Setting > Integration > Create new webhook
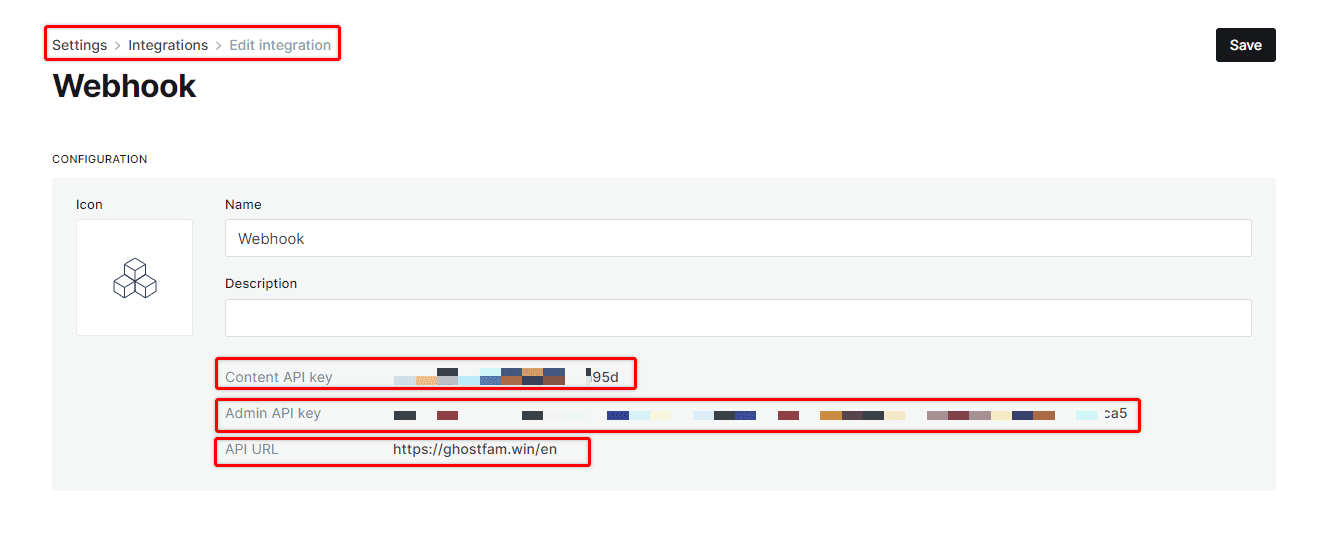
Fill in the necessary information in the Cove Chat dashboard and move on to the next step.
Step #2: Get the Cove ID code and install the theme
You need a Cove IDfor TanaFlows to use Cove Chat. Go to the Comment tab in Cove UI and get your comment code.
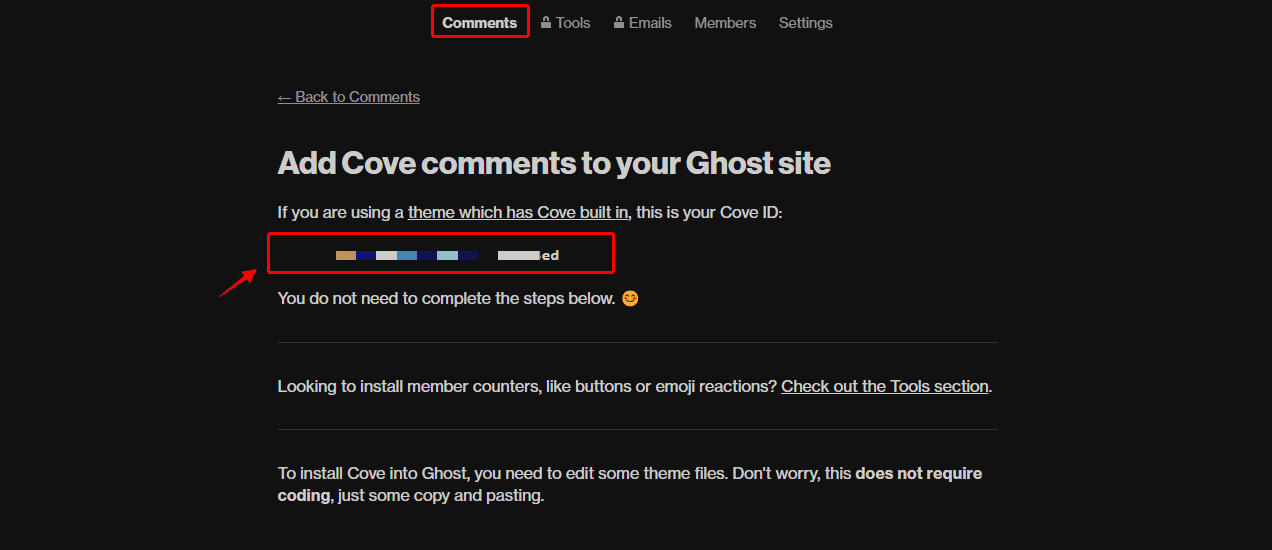
Cove IDYou go to Setting > Design > Posts select Cove provider and paste the Cove ID in step 1.
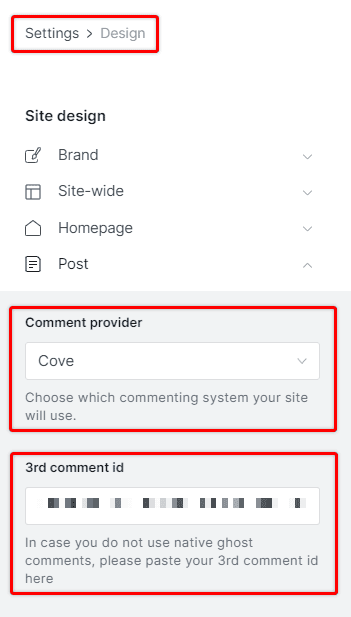
Cove ID in 3rd comment idSave and done!